Here are steps on to set up a VPN in Windows 10:
How to set up a VPN in Windows 10:
Before following this procedure, you need to log in to your Windows 10 with administrative privileges and then follow the below steps
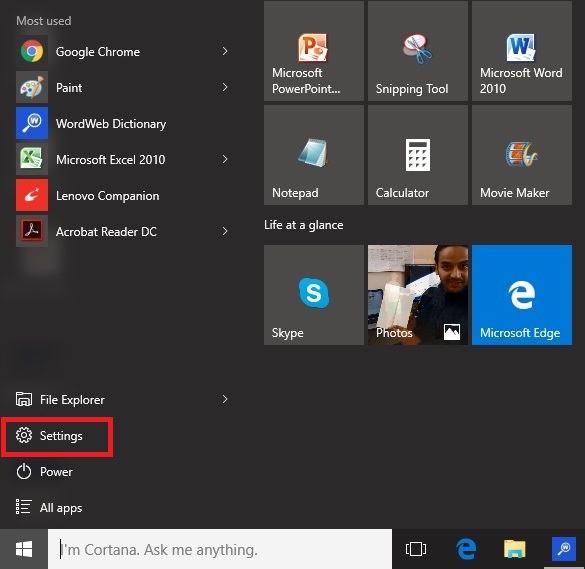
- Open Settings of your Windows 10 computer to get started with setting up a VPN in Windows 10.
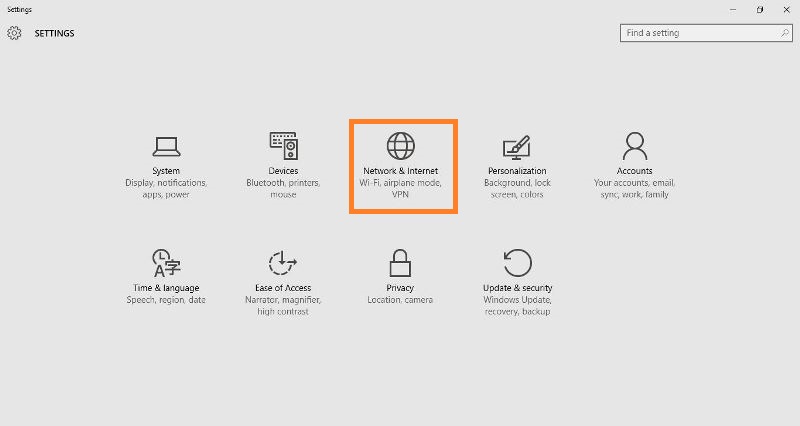
- Click on “Network and Internet” icon and open the relevant settings.
- On the left panel, click on VPN and VPN setup window will open.
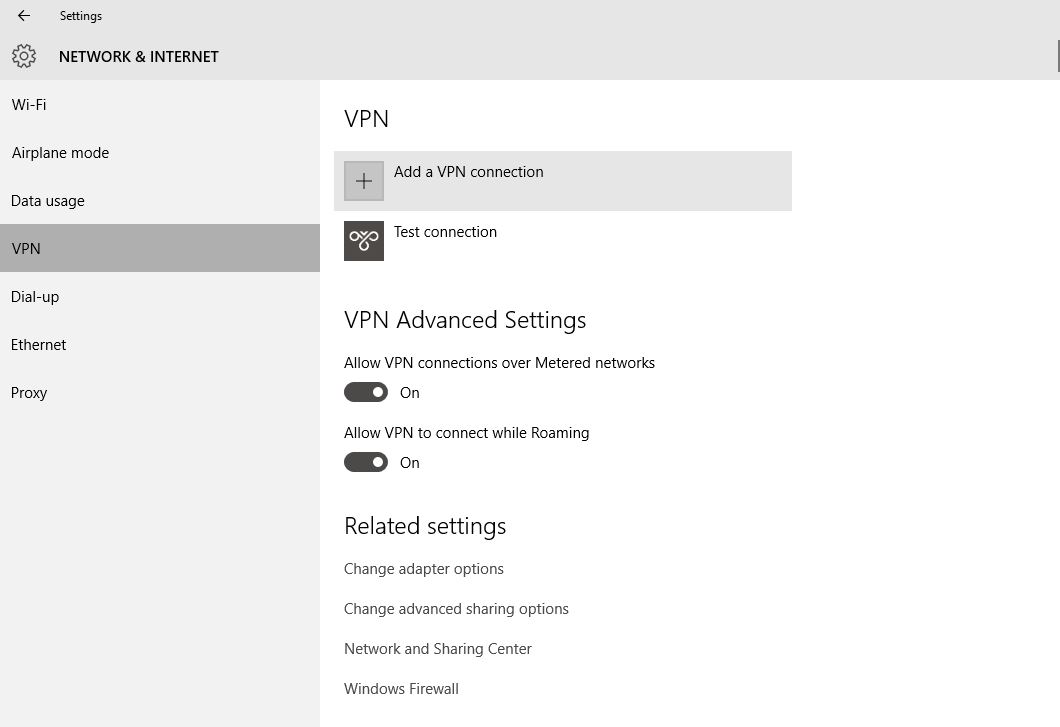
- Click on “Add a VPN connection” and a new window will open up to set up the VPN in Windows 10.
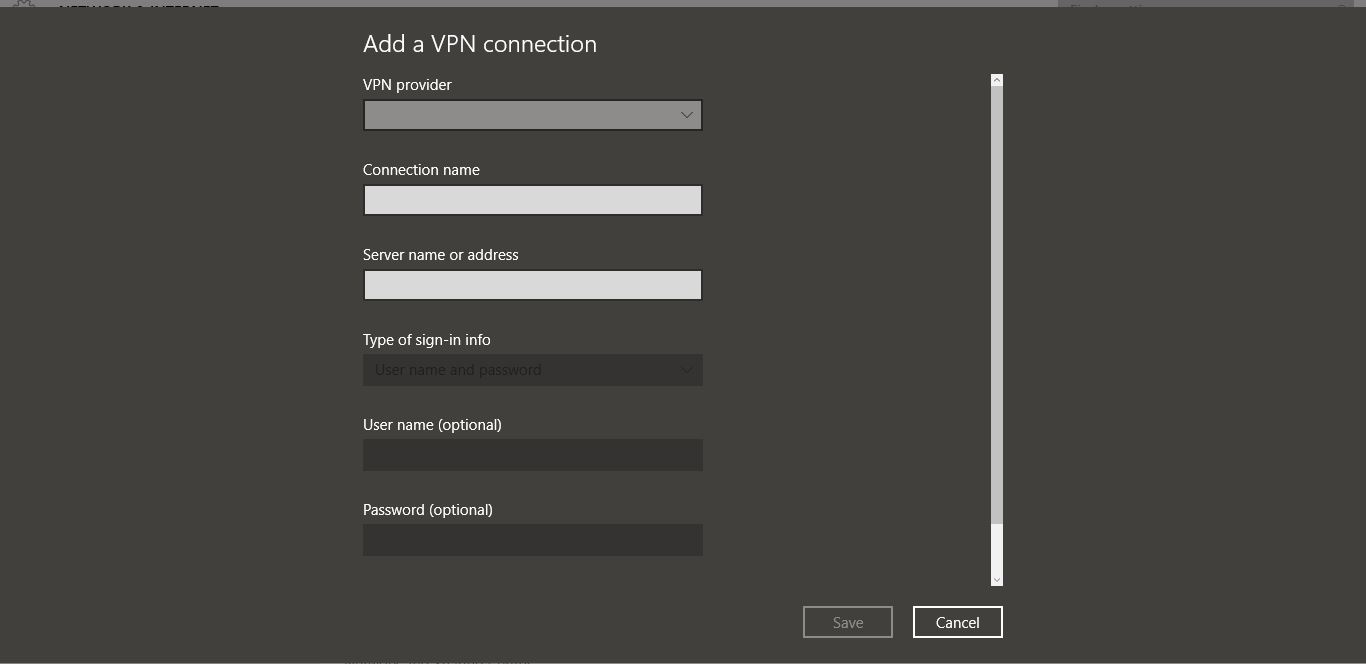
- Fill up the following details under “Add a VPN connection” Window
- Select Windows (built-in) under VPN provider
- Give a connection name as per your choice
- Enter server name or Address
- Under the VPN type, select “Point to Point Tunneling Protocol (PPTP)”
- Under the “Type of sign-in info”, select one of the options of your choice
- Enter Username and password, if necessary
- Check “Remember my sign-in info” at the bottom to avoid logging in again and again in future
- Finally, save
- Now you will see, the new added VPN connection under the VPN Windows
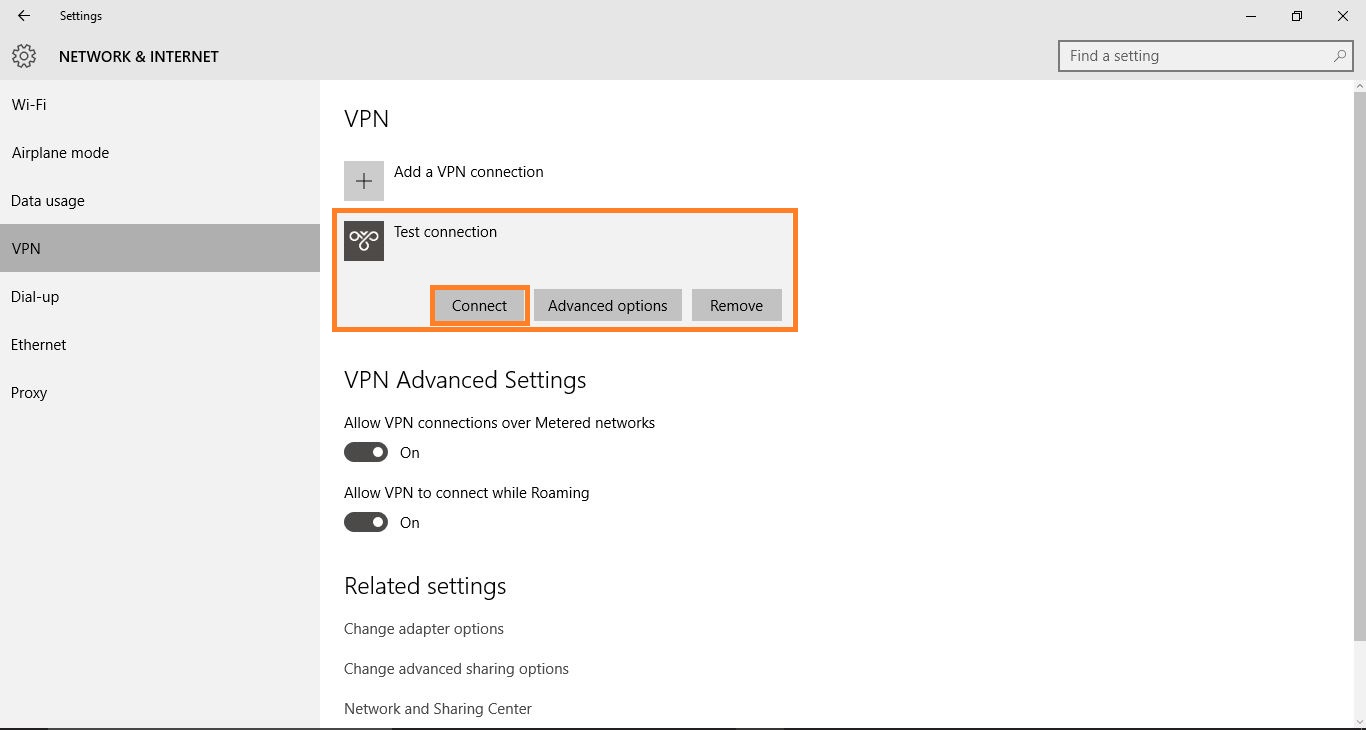
- Click on that newly added VPN connection and click on “Connect” and that will connect you to your server
- If you want to re-edit the information of your newly added VPN, click on Advanced options just beside “Connect”
- Advanced options will show you connection properties of the newly added VPN. Click on Edit to re-edit the VPN information.
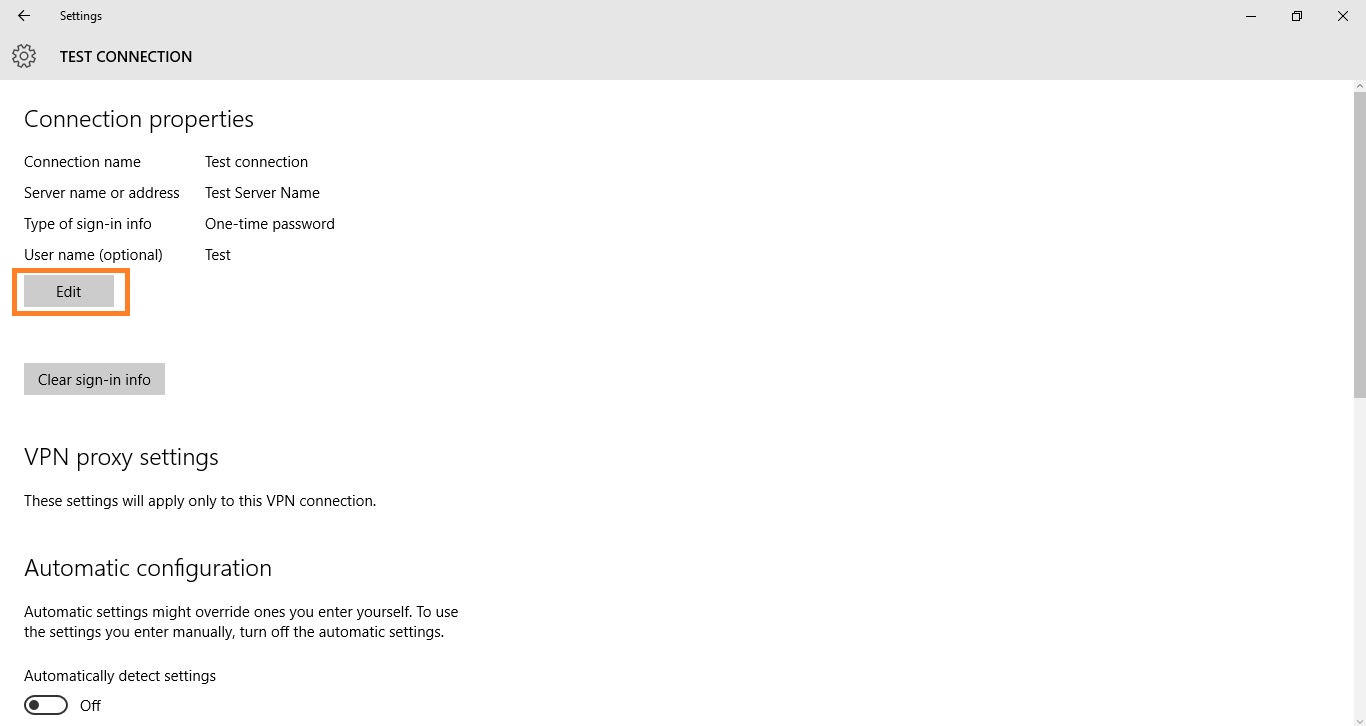
You can also click on “Clear sign-in info” just below the “Edit” option in the above picture to clear your password/ username or OTP for your VPN connection on Windows 10.


No comments:
Post a Comment